Updated Sep 20, 2021
The global ammunition market is expecting to reach $28.37 billion by 2028. The AR-15 and upper receiver sales continue to build those numbers.
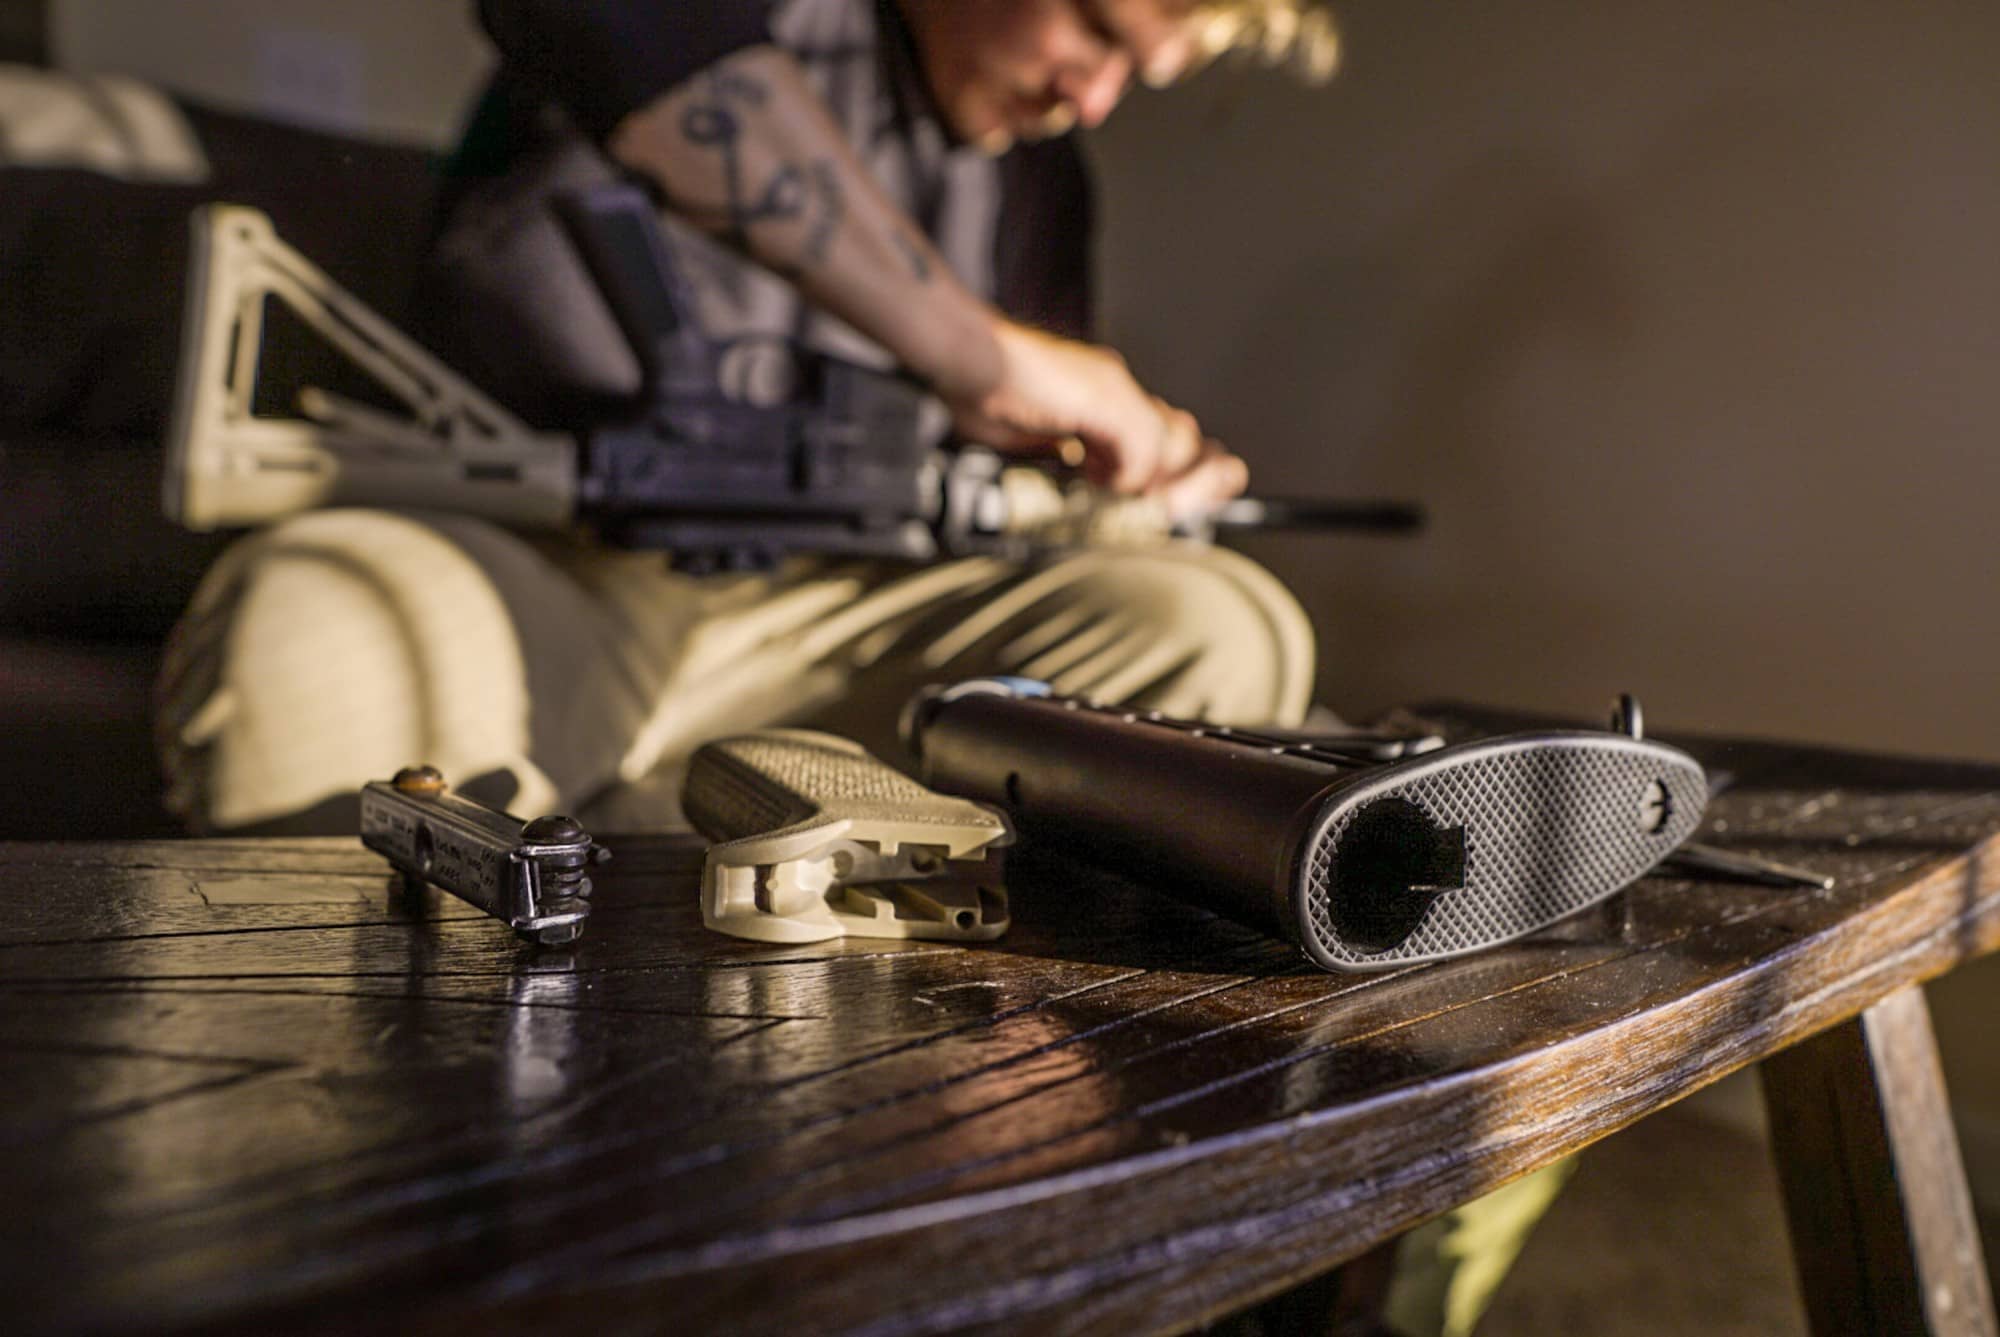
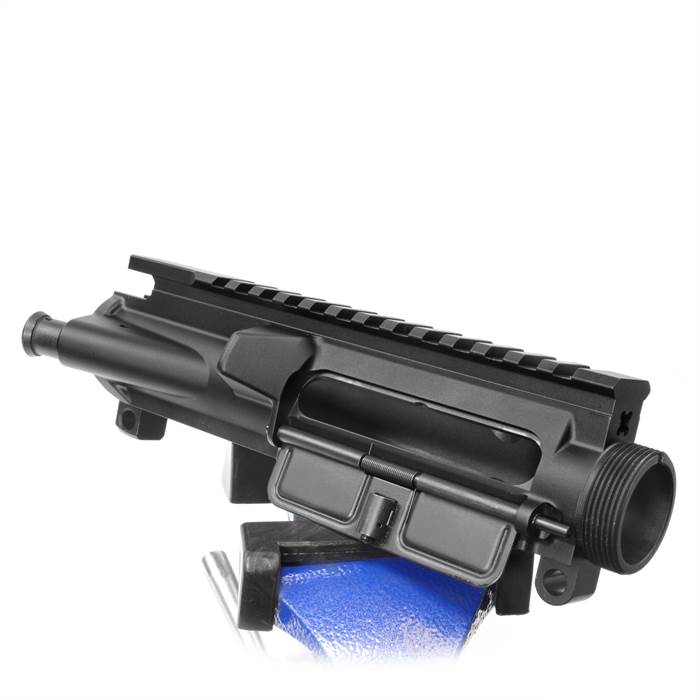
When building an upper receiver, you'll have to understand how to assemble the various parts. Most standard upper receiver comes the ejection port cover and the forward assist installed. However, for those of you want to build the upper receiver from the ground up, or to choose individual parts to optimize your upper receiver, this short guide will give you all the ins and outs of building the ultimate upper receiver for your AR-15.
Parts & Tools to Build a Receiver
Here are the items you need to build an Upper Receiver.
Parts:
- Stripped Upper Receiver
- Forward Assist Assembly
- Forward Assist Roll Pin
- Forward Assist Plunger Spring
- Ejection Port Cover
- Ejection Port Cover Rod with C-Clip
- Ejection Port Cover Spring
Tool:
- Needle Nose Pliers
- Small Hammer/Rubber Mallet
- Roll Pin Punch
- Roll Pin Starter (optional)
- Slave Pin (optional)
- Vise Block (optional)
- Gun Oil (optional)
Steps to Building an Upper Receiver
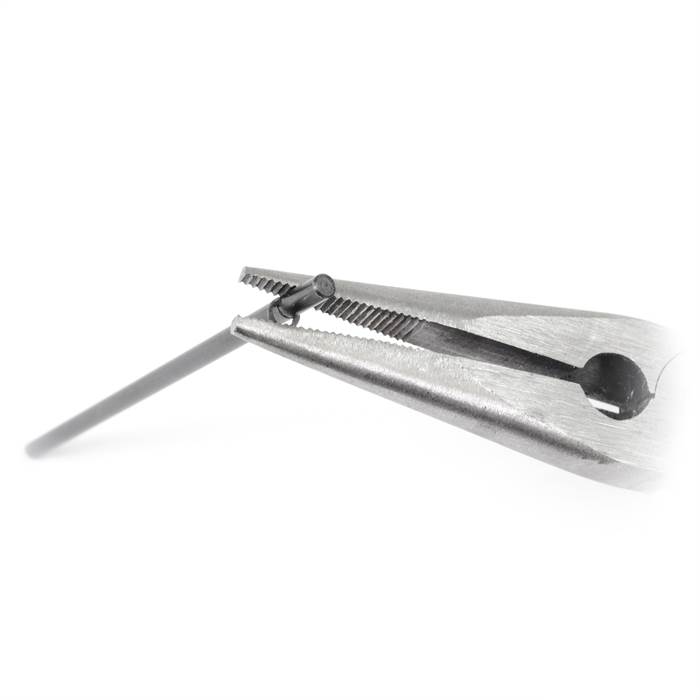
1. You'll want to attach the small c-clip to the ejection port cover rod. This will soon be part of the assembly for the ejection port cover. There is a small groove near the end of the ejection port cover rod. Place the small c-clip into the groove.
You can apply this c-clip to the groove using the aforementioned needle-nose pliers. This should fit into that specific channel. Be careful, as this piece is small and the pliers can cause damage to the part if it is stripped.
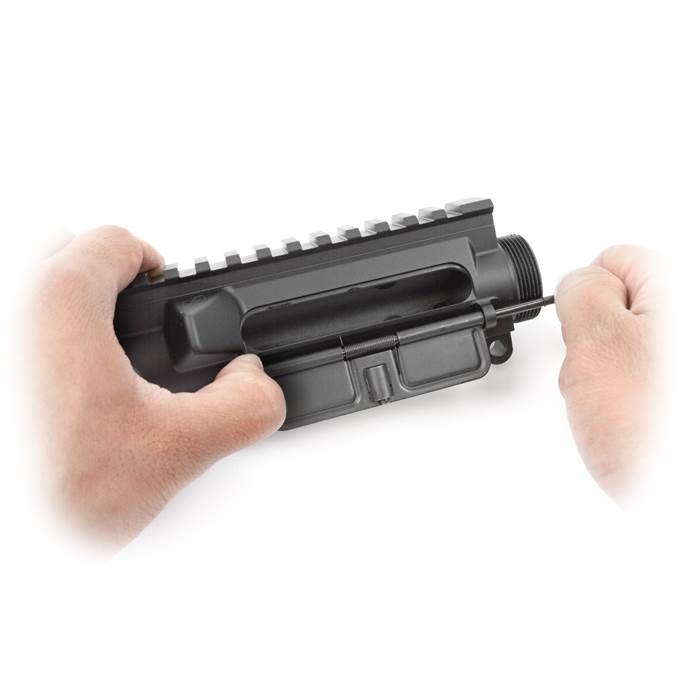
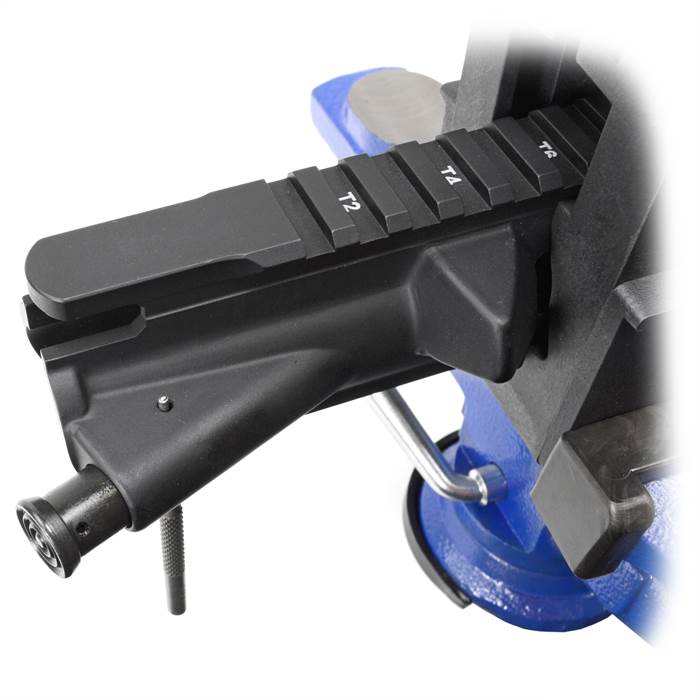
2. Add the Ejection Port Cover: Once you secure the c-clip in place you can apply it to the upper receiver. To make installation easier, you can apply a small amount of gun oil on the ejection port cover rod. The upper receiver itself can be comfortably secured onto a vise block.
The vise block can help secure the upper receiver in place for customizations. Once the upper receiver is in place, compile the pin and clamp. Insert the ejection port cover rod into upper receiver from the front.
The ejection port cover should press into the receiver while inserting the rod. The rod will be placed in an upward connection. While inserting, the c-clip should be facing the barrel end.
Before fully inserting the rod put the spring in place. The spring has two legs, one is short and the other is long. The long spring will also face the barrel end, sitting comfortably in its channel on the ejection port cover.
But, to get spring tension, you have to twist the spring. Take the spring, twist the long end to wind it up, building further tension. Place it carefully between the two slots on the ejection port.
Feed the rod through the slot into the spring. Make sure to keep the tension in place while sliding the pin through the spring.
Push it through until the c-clip is flush with the first slot of the upper receiver. The legs of the spring should sit in two positions.
The long leg sits on the channel at the bottom while the short leg sits at the top of the covering. The short leg will rest against the upper receiver.
3. Install Forward Assist: Make sure to keep the upper receiver snug in a vise block. Set it up in a way that allows you to have easy access to the back of the AR-15 upper receiver.
The roll pin will insert into the upper receiver to secure the forward assist. There's a couple of different ways to approach this method. But, the following instruction is one common method to use.
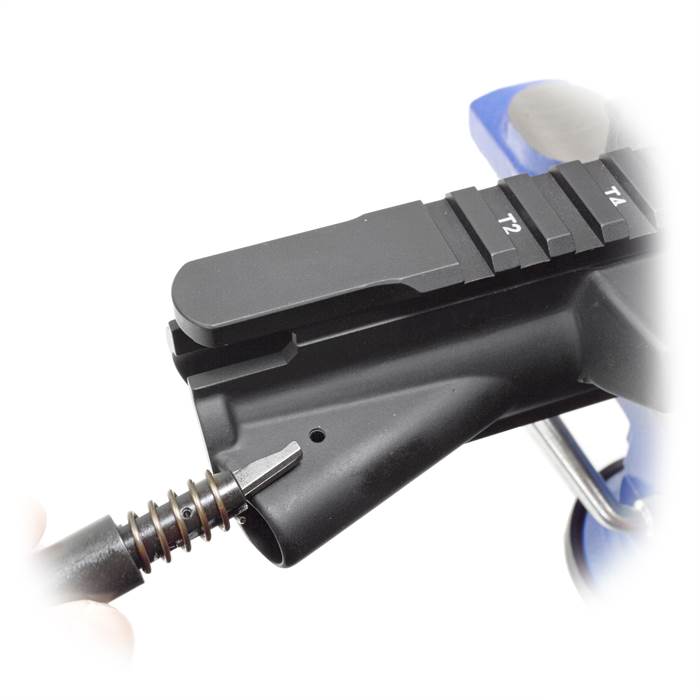
You can collect a pre-assembled forward assist. It will come with a sturdy spring and roll pin. Slide the spring over the tooth of the forward assist.
You will notice that the tooth of the forward assist pivots. The tooth is the part that inserts into the slats of the bolt carrier. This is so it can help the assist forward.
The forward assist curves in one direction. When inserting the forward assist into the upper receiver, make sure the hook side of the tooth is facing the inside of the receiver. After installation, the tooth of the forward assist should push out away from the AR-15.
You can lube the roll pin with oil before inserting it into the hole of AR-15. Once the forward assist presses in, clearing the hole, you can use a slave pin to hole the forward assist in place when inserting the roll pin.
4. FA Assembly: You can use a slave pin to hold the forward assist assembly in place while installing the roll pin.
Grab the roll pin starter and your small hammer. Use the roll pin starter to insert the roll pin in to the hold. Then, take the roll pin punch and press it against the roll pin. Hammer it in until it's flush, allowing the forward assist to move with ease.
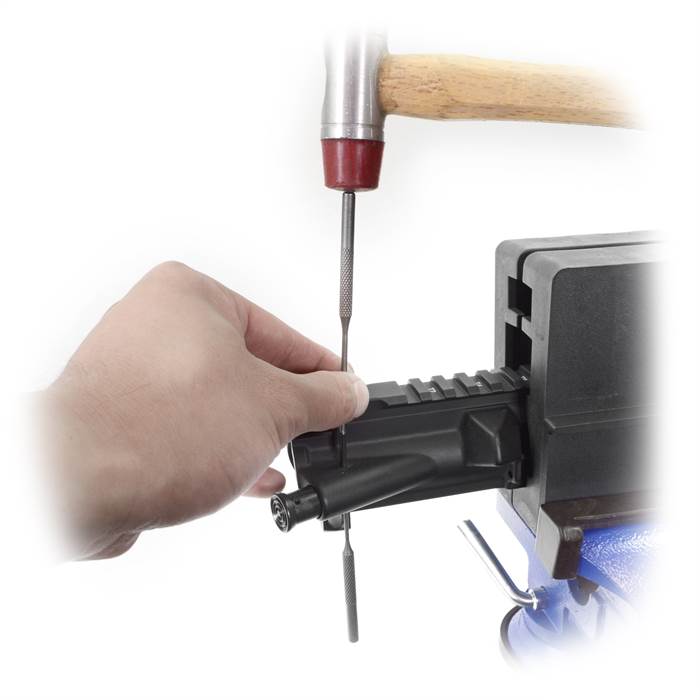
An easier way to do this is to flip the upper receiver and grip it with the vise block. Hammering the pin in from the bottom can be easier. Plus, it can contain any accidental damage to the AR-15 upper receiver. So, it will either go unnoticed or suppress any knicks or scrapes.
5. Check Everything is Functioning Properly: Remove the upper receiver from the vise block and check the forward assist tension. Then open and close the ejection cover to check its maneuverability.
If any part catches, adjust accordingly and find the source of the issue. If these parts catch for any reason, it can cause damage to the AR-15 parts. Once you're done you can begin to learn the basics of shooting and have fun with your AR-15.
Summary
The AR-15 is a powerful and effective weapon on the market today. Following these tips can help prevent any maintenance issues with your upper receiver.
The upper receiver is one of the many customization options of AR-15. Be sure to check out augmentations to suit your AR-15 needs.
Follow our blog for more information on how to build customize and upgrade your AR-15 today! Contact Wing Tactical with questions or check out our vast inventory of top-quality AR-15 parts and accessories to optimize your firearms and get the best possible shooting experience.